When it comes to building a sturdy and reliable deck, the ledger board plays a crucial role. The ledger board is the anchor point for framing and secures your deck to your home. Without a stable ledger board, your deck would be compromised, leading to safety concerns and structural failures.
I’ve seen firsthand how important it is to get this step right. In fact, it’s the most likely place a deck will fail. Whether you’re tackling your first DIY deck project or refining your skills, learning how to attach a ledger board properly is a foundational step.
Let’s walk through the process together. I’ll share tips I’ve picked up over the years and make sure you’re set up for success.
What is a Ledger Board?
 A ledger board is a horizontal piece of wood – most often pressure-treated lumber – that attaches a deck to a home or building. It supports one end of your deck joists and ensures the deck remains secure and level. Think of it as the backbone that ties your deck to the stability of your home.
Beyond structural support, the ledger board also plays a vital role in distributing the weight of the deck and its occupants evenly across the structure. This is why proper installation is non-negotiable.
How to Attach a Ledger Board to a Deck
 Attaching a ledger board is a step-by-step process that requires precision and attention to detail. I suggest setting aside a full day. Installing a 14-foot by 22-foot deck for two people with a moderate skill level could take between six to 12 hours.
By following these instructions, you will understand how to attach a ledger board.
1. What You’ll Need
Before we dive in, you’ll want to ensure you know your local building codes and the location of buried utility lines in your yard. Your deck’s design and materials will guide the size and style of your deck and the specific tools you’ll need. Having everything ready before you start can save you time and frustration.
In general, here’s what I recommend having on hand:
Tools:
- Caulk gun
- Chalk line or laser level
- Circular and compact saws
- Clamps
- Drill with drill bits
- Hammer
- Level
- Pencil
- Scissors or blade for cutting materials
- Screwdriver or impact driver
- Speed square
- Tape measure
Materials:
- Exterior-grade caulk
- Flashing tape (such as Trex Seal)
- House wrap or moisture barrier
- Lag screws or bolts
- Ledger board (pressure-treated lumber, at least 2 in x 8 in)
- Rigid and flexible flashing
- Shims (if needed for uneven walls)
Practical Tip: If you are concerned about your ability to complete this project at this step, I recommend you find a builder to talk with and give you an estimate for a professional installation.
2. Plan and Measure
 With your materials and tools in place, it’s time to plan your layout and installation. Measure the height of your deck carefully, ensuring it aligns with any doors or thresholds it may connect to. The top of the ledger board should be lower than the thickness of one deck board and the flashing. If the deck board is 1 inch thick and the flashing is 1/8 inch thick, then the top of the ledger board should be 1 and 1/8 inch lower than your desired deck height.
Practical Tip: Double-check your measurements—a slight miscalculation can lead to alignment issues later. I always use a laser level or chalk line to mark a perfectly straight line across the wall. This simple step saves a lot of headaches later.
3. Prepare the Wall
The wall where you’ll attach the ledger board must be clean and prepared. Remove siding or cladding to your desired deck height to expose the bare wall underneath. Remove enough to account for installing the flashing above and below the ledger board. Working with a clean, flat surface ensures the ledger board will sit flush against the wall.
Practical Tip: Use a circular saw to cut the siding carefully. This ensures a clean edge, and sealing the exposed edges afterward will help prevent water damage. I always keep the removed siding intact for reinstallation around the ledger board. If your wall isn’t perfectly flat, use shims to create an even surface for the ledger board.
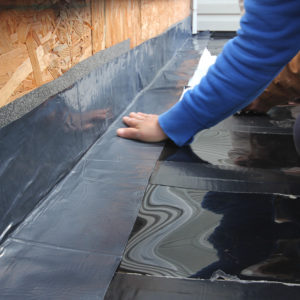
4. Install Flexible Flashing
 Regarding decks, 90 percent of the damage that’s caused comes from around ledger boards and rim joists. So being especially careful with waterproofing and rot prevention here makes sense.
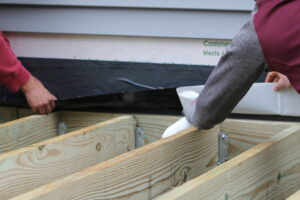
Flexible flashing is a thin, waterproof material that prevents water from seeping behind the ledger board. This step is critical to protect your deck and avoid water damage and rot over time. I like to use a self-adhesive flashing membrane for easier installation such as Trex Seal Sub-Ledger tape. Ensure it extends both above and below where the ledger board will sit. Use caulk where door frames and flashing connect to provide an additional seal.
Practical Tip: Double-layer flashing offers even more protection, with one piece below and another above the board. Tuck the top edge of the flashing under your house’s siding for optimal results.
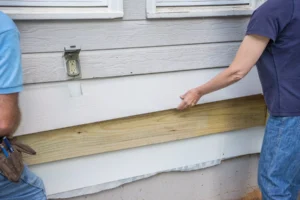
5. Position the Ledger Board
If you haven’t already, cut the ledger board to the desired length. Trim 1.5 inches off each end of the ledger board to accommodate the band joists (the two outermost joists) that will be installed later.
Mark on the board where to fasten the joists according to local codes and size and load of the deck. Place the ledger board against the wall that has been prepped with flashing. Align the board to the height line you marked earlier. Check that it’s level before proceeding.
Practical Tip: I find it helpful to temporarily clamp the ledger board in place. This keeps it steady and frees up my hands while I work. Make sure the board’s dimensions match your deck’s structural requirements.
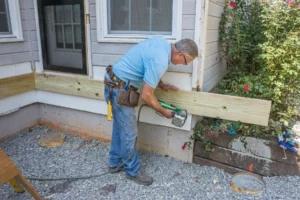
6. Secure the Ledger Board
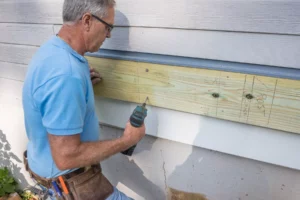 Using lag screws or bolts, attach the ledger board firmly to the wall. Ensure each fastener is driven in tightly to provide a secure connection. For most installations, spacing lag screws 16 inches apart and staggering them vertically will provide optimal stability.
Once the ledger board is secured, check its alignment and stability. Ensure it’s perfectly level and flush against the wall. Give it a firm shake. A misaligned ledger board can cause issues with the rest of your deck’s construction.
Practical Tip: Most codes require the outermost fasteners on the ledger board to be 2 inches from the end of the board. Code also dictates how close fasteners can be to the top and bottom of the board. Be sure to check local regulations.
8. Add Rigid Flashing Above the Ledger
 Install rigid flashing (metal or plastic) above the top edge of the ledger board. This acts as an additional barrier to prevent water from getting behind the board. Trex® Seal Sub-Ledger Tape Ledger is an alternative to traditional rigid flashing. It is a butyl-based flashing tape with an aluminum liner used to seal the ledger and provide a water-tight barrier between the ledger and the house.
Practical Tip: Tuck the upper edge of the flashing under your house’s siding for maximum protection. You can also tuck the edge of the flashing behind any door frame.
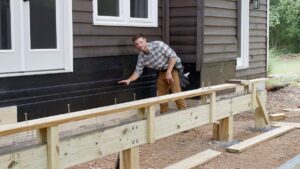
9. Test the Installation
Before moving on to the next stage of deck construction – installing joists – thoroughly inspect and test the ledger board installation. Check for any signs of movement or gaps between the board and the wall.
Practical Tip: I often have a friend or family member help apply pressure to simulate the weight the board will bear. It’s a good way to ensure it holds steady.
Conclusion
Attaching a ledger board may seem like a daunting task, but with the right tools, materials, and approach, it’s entirely manageable—even for a DIYer. Remember, this step is the foundation of a safe and secure deck, so take your time and follow each step carefully.
Sources:
Decks.com, “Attaching a Ledger Board for Your Deck,” Aug.4, 2004
https://www.decks.com/how-to/articles/attaching-a-ledger-board-for-your-deck
MyFixItUpLife, “How to attach deck ledger board to house securely”
https://myfixituplife.com/build-a-deck-attach-the-ledger-board/
Home RenoVision DIY, Jeff Thorman, “How to Attach a Deck to a House”
https://www.youtube.com/watch?v=V6rTe0ljvPE&t=20s
“How to Install a Deck Ledger Board and Attach Flashing”
Trex Seal, Dave Kile, “What is a Ledger Board? All You Need to Know”
https://trexseal.com/blog/what-is-a-ledger-board-all-you-need-to-know/
Trex Seal, Dave Kile, “Protect Your Deck Where It Matters Most”
https://trexseal.com/blog/protect-your-deck-where-it-matters-most/