I’ve been a champion of composite decking for years because it has so many advantages over wood, including greater durability, less maintenance, and exceptional board-to-board consistency.
Even so, the cut ends of Trex composite decking can require more attention than those of wood decking. With wood, you can just sand and/or router the cut ends and then stain or seal them. With composite decking, the cut ends must be handled differently. Read on to learn what the deck-building options are and how to choose the method that’s right for your DIY decking project.
Methods for Finishing the Ends of Composite Decking
You can finish the cut ends of composite decking by concealing them in the deck design pattern (picture framing), covering them with trim pieces or raised fascia boards, adding an end cap, or applying paint. Below, I explain the basics of each approach and the advantages and drawbacks. Follow along, and soon, you’ll be ready to add a professional polish to your DIY deck!
Picture-Frame the Deck
 In my book, the picture frame is the best way to conceal the cut ends of composite deck boards. It hides them by using a deck board that runs perpendicular to the cuts, which makes an attractive deck layout and elegant picture frame border for your outdoor living space.
To use the picture-frame method, you must plan the layout of your deck frame carefully. If you also plan to avoid butt joints, the maximum available length of the main deck boards will determine where the picture frame boards will go. But whatever the deck size, you’ll need to factor in:
- The dimensions of the deck substructure
- The board widths
- The spacing between boards and
- The amount of overhang, if any.
Picture frames—which can be one, two, or three boards wide—also need special joist spacing and blocking to support the picture-frame boards and the exposed ends. This is especially important where the boards run in the same direction as the joists. Fasten the blocking with screws, not nails, 12 inches on center.
Next, install the main decking boards parallel to the house, leaving enough space on all four sides for the picture-frame border. Then, measure and miter-cut the picture-frame boards and test-fit them around the perimeter of the installed deck boards. Use a jig saw to notch any picture-frame boards that must fit around posts.
When test-fitting the boards, make sure the spacing is uniform. Also, verify that the outside picture-frame boards either align with the edges of your deck or overhang the edges by a uniform amount. Secure all the boards using screws or the manufacturer-recommended hidden fasteners.
Install a Raised Fascia Board
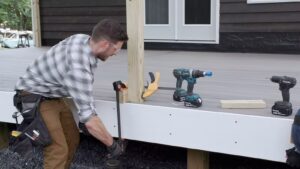 Installing fascia boards along the perimeter of the deck also provides a finished look to the cut ends of composite decking boards. These trim boards can be made from the same composite material as the decking or something else, including PVC or wood. I recommend using the same material for your composite fascia. But feel free to use a different color that complements the main deck boards or matches the railings.
To install raised fascia, cut the ends of the deck resboards so that they’re flush with the edge of the deck’s framing or with the deck’s apron trim. Then cut the fascia board to length and screw it to the deck so that its top edge is flush with or slightly proud of the deck surface. Use miters to join the fascia boards at outside corners. At inside corners, butt joints are acceptable.
Install Trim Pieces
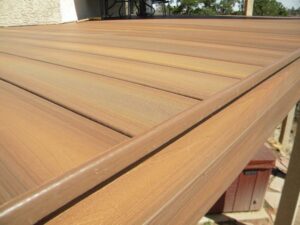 Adding trim pieces, which you can buy or make, to cover the cut ends of the decking boards is fast and inexpensive. These long strips can be rectangular or L-shaped and made of composite decking material, wood, PVC, or metal. They require no special blocking. Instead, you can fasten the trim pieces to the deck boards simply by driving long, weather-proof screws through the trim and into the cut ends. Countersink the screws to ensure a smooth perimeter surrounds your outdoor space.
Add End Caps
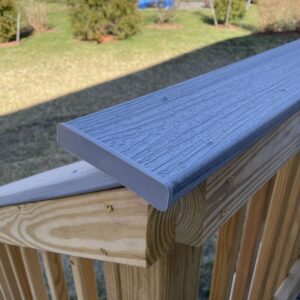 A few composite decking manufacturers offer end caps that insert into the profile of hollow or ridged deck boards. These plastic caps go on fast and provide a finished look that protects the exposed edges from moisture, debris, and insect nests. People like these caps because they provide and off-the-shelf solution, allowing you to focus on the rest of the deck building tasks you’ll face.
Paint the Board End
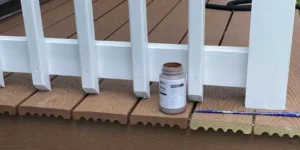 This method provides the least polished finished look, but it could be right for your application. First, check whether the manufacturer recommends it and, if so, which paints are acceptable. But don’t paint the board’s surface. Not only will the coating fail after exposure to the elements—the opposite of home improvement—but it will also void your warranty.
Every method of finishing cut ends during decking installation has advantages and drawbacks. To choose one, consider your project’s specific requirements in terms of budget, aesthetics, and type of composite decking.